
Today I’m excited to share a card I made for this week’s challenge at Classy Cards ‘n Such: Fall Picnic. Of course, I used many crafty goodies from CCNS store to create my card, some lovely supplies I must add!

To make this card, first I die cut my card base with Our Daily Bread Designs’ Vintage Flourish Pattern, and then I die cut a window on it’s front with the coordinating frame from the same set. I cut an inner layer that matched the size of the card base from White Pearl Linen. I printed a piece of plaid patterned digital paper on White Pearl Linen also, and adhered it covering one third of the inner layer, to work as a picnic blanket. I aligned the inner layer with the card base, marked the window outline on it and die cut it with the coordinating frame die. The frame that resulted was attached to the inside of the card, after I aged it with Distress Ink in Old Paper, with a Mini Ink Blending Tool. The other remainding part of the inner layer was attached to the card front, from the inside.
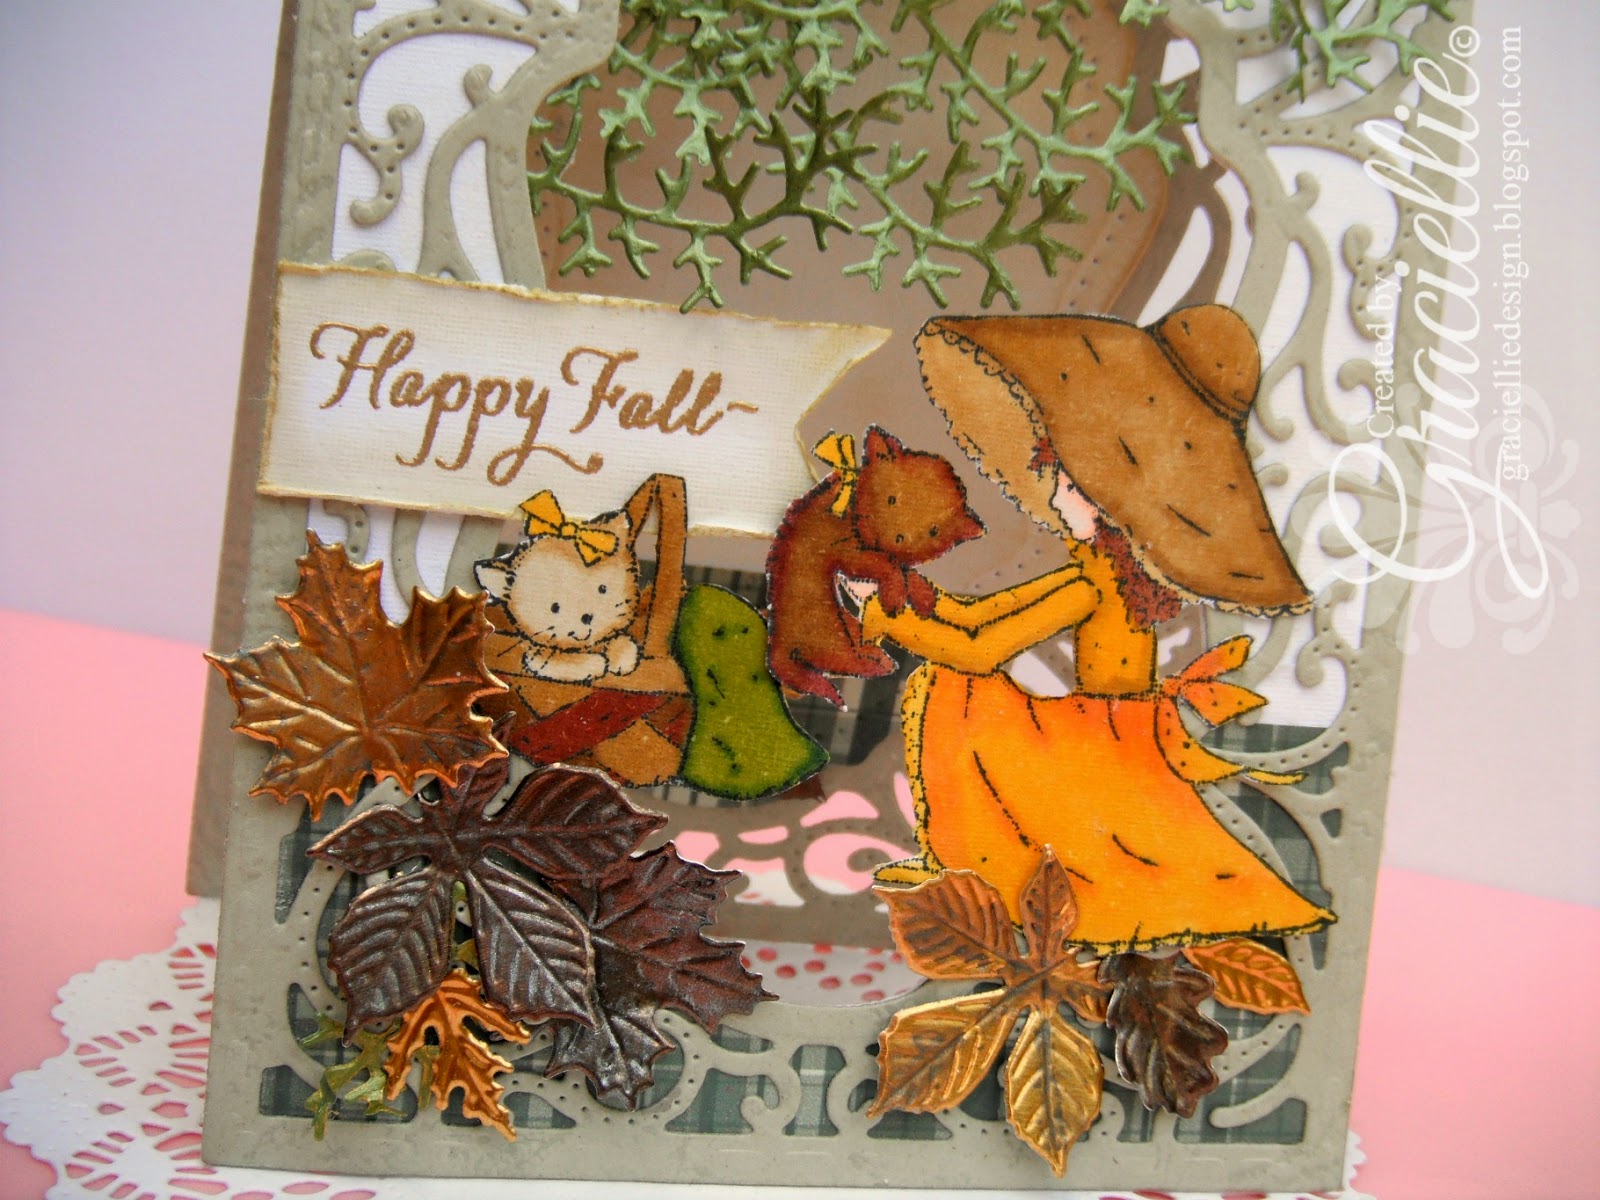
Once the card base was entirely ready, I started working on all the elements I needed to complete my card. I stamped Wild Rose Studio’s Kitty Picnic on White Pearl Linen and colored it with Spectrum Noir markers. I fuzzy cut it and adhered the images to the card front with Tombow Mono Multi Glue.
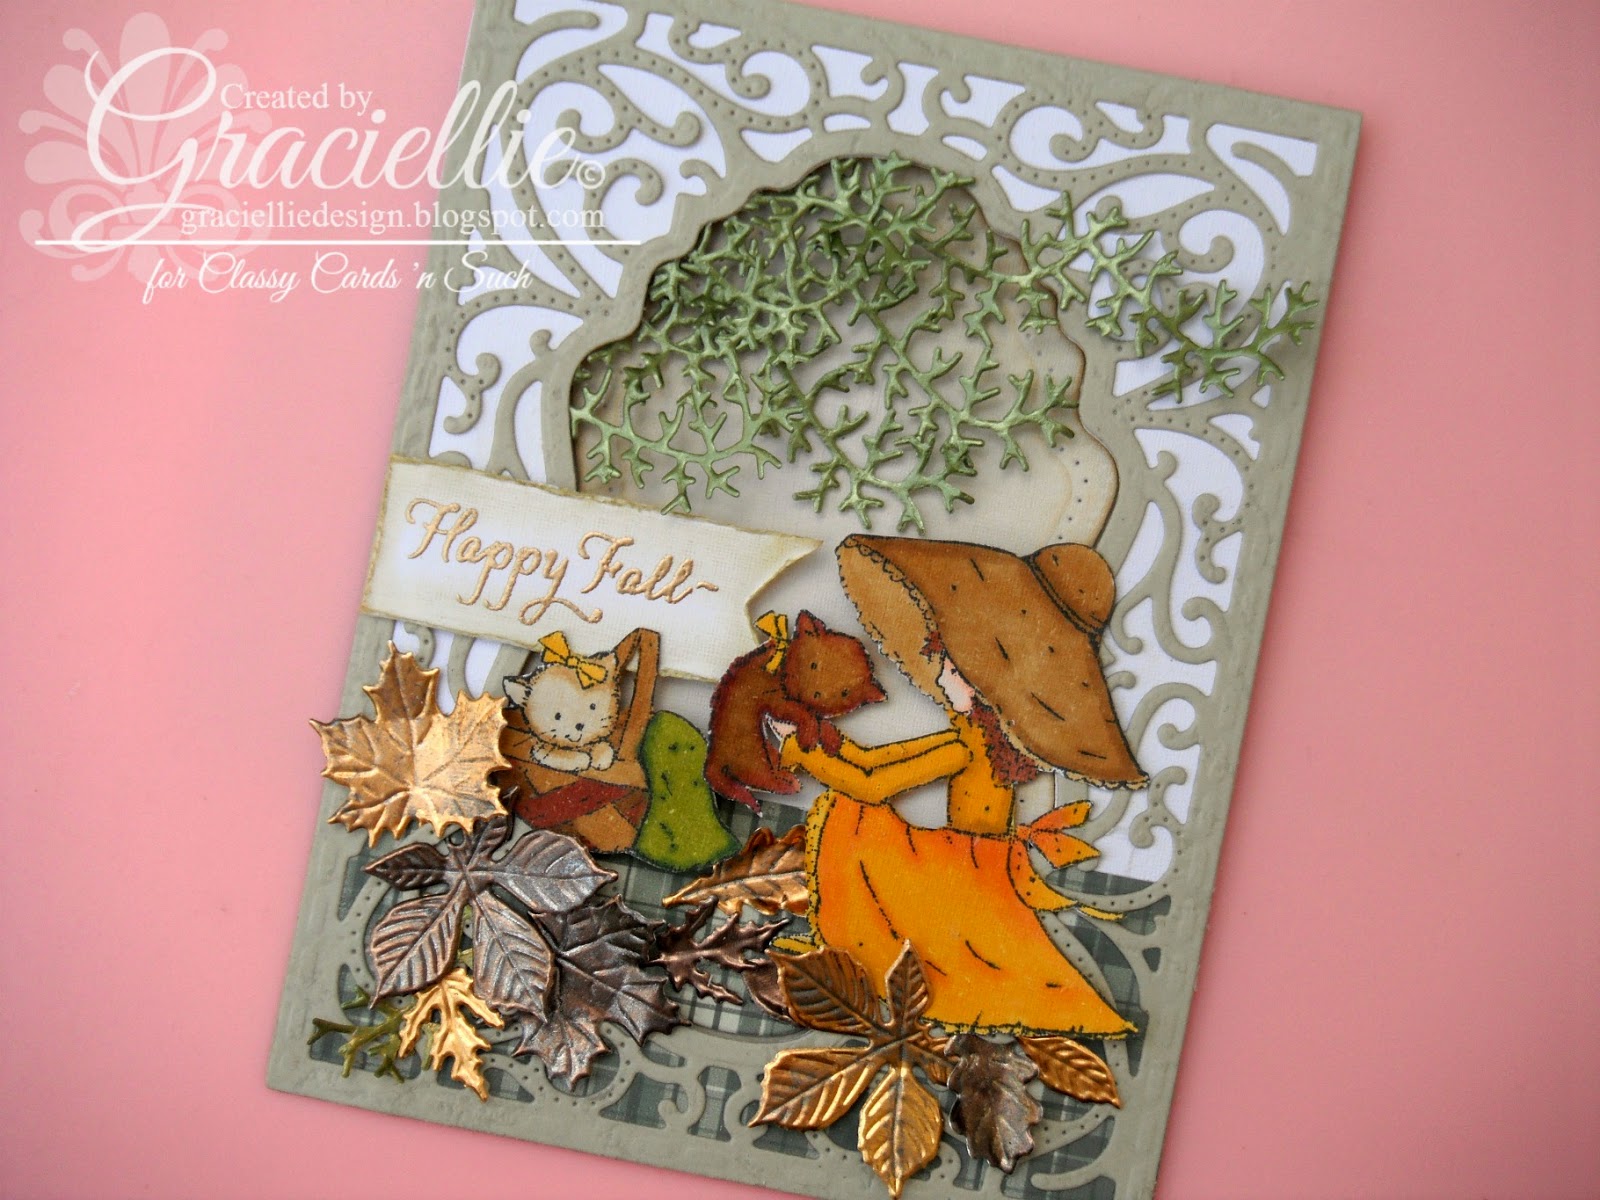
I then die cut lots of leaves from Precious Metals Craft Foil by Spellbinders with Impression Obsession’s Small Leaf Set. I applied some Graphite Inka Gold to the craft foil leaves, to make them look a bit organic. I added the leaves on the bottom of the card front around the images, arranging them to look like a bed of leaves. I adhered them with UHU all purpose adhesive (silicone gel glue).

I also used other die cuts as tree branches that I cut from olive green paper with Poppy Stamps’ Pine Garland. I cut around four or five of them and adhered them with Tombow Mono Multi Glue to the card front from the inside, so they’d appear to be coming out of the window.

Finally I heat embossed a sentiment, from Sweet ‘n Sassy’s Autumn Mum Greetings stamp set, with Gold detail embossing powder on a little banner that was die cut with the smallest die from A2 Matting Basics A. I distressed the die cut’s edges, and applied Distress ink in Old Paper to it, and next I cut it’s right end with a scissor to create the classic banner shape. I mounted it with foam tape on the left side of the card, and cut the remainder piece to fit the card’s width perfectly.
I hope you enjoyed seeing my card! I invite you to join our challenge this week for a chance to win a prize from the store and the Classiest Card Award too. To check out the supplies I used for today’s project click on the supplies’ links or visit Classy Cards ‘n Such store to see all what’s been added recently! If you do purchase don’t forget to use my code Gracie-10 during checkout to get 10% off your order!
Thanks so very much for stopping by.
I’d like to submit my card to:
It’s my Favorite (Window Cards) – Mod Squad Challenge
Warm Colors (Using KITTY PICNIC Clear Stamp) – Loves Rubberstamps Challenge
Falloween Fun – Poppystamps Challenge
Sketch #22 – STAMPlorations
Scripture Inspiration Challenge – Our Daily Bread Designs
(A time to weep, and a time to laugh)
(28/10/14) And:
Fall/Autumn – Stamp and Create


Cute, cute, cute! Love this!
LikeLike
Just gorgeous! I absolutely love this card!! Just keep making your amazing creations!
LikeLike
GRACIE! Your talent never ceases to amaze me! Your style is so original and meticulous! Very impressive, Girlfriend!
LikeLike
What a beautiful scene! I love the metallic shine you added and the pretty detailed dies!
LikeLike
Thanks SO much for your kind comment!
LikeLike
TY Jeanne!
LikeLike
Very festive autumn card with all the layers and textures and I love seeing your use of metal foil! Thanks for joining us over at Poppystamps!
LikeLike
Beautiful Autumn card, love this image and dies you have used..
LikeLike
This is absolutely stunning Gracielle!! I love your use of the die and how you left a window. Such a cute scene and stamp with so much texture!! Thanks for joining us at ODBD this week!!
LikeLike
Wow Graciellie, this is gorgeous! Love how you used the ODBD Vintage Flourish Pattern Dies and made the window on your card. All the other stamps and diecuts are gorgeous too – you've made such a beautiful scene. Thanks so much for joining us in the ODBD Shining the Light challenge this week. Elizabeth
LikeLike
Oh, Gracie, this is one of the most beautiful cards, and I love your gorgeous garden scene with this wonderful sweet girl in her sun bonnet with her kitties! OH, I love it! I love all the wonderful details and how you've used this gorgeous ODBD die – such a great idea! And all the beautiful details and how you've finished them are amazing! So glad you've joined us for the ODBD Shining the Light challenge! Hugs, sweet, talented friend!
LikeLike
Sorry if this comes out twice, dont go on blogs as often, still learning. I had to say how charming this is, in all its fall love and splender. I so want to join thsi lil sweety in the picnic with her friends and the beauty all around. So much work but soooo worth it. The details and coloring are fantastic….TFS..:0)
LikeLike
Oh Wendy, I enjoyed reading your comment very much! I am so glad you liked my card that much. Thank you for stopping by!!!
LikeLike
This is such a lovely card. Thank you so much for playing at Loves Rubberstamps!
LikeLike
This is so pretty. Love the shine on the leaves and the pretty scene you created.
LikeLike
Very sweet card, love all the elements here. Thanks for playing along with us at Mod Squad this week.
LikeLike
Such a delightful full scene! It really captures the imagination! Love the use of the ODBD vintage die for the background! So many details to take in and enjoy! Just beautiful! Thanks for creating with us at ODBD Graciellie!
LikeLike
Thanks so very much. Your comment made my day! Hugs.
LikeLike
Very pretty card. Love all the details. Very pretty design. Thanks for joining us at Loves Rubberstamps!
LikeLike
What a pretty card and so much detail on it.
Thanks for joining our first challenge at PoppyStamps!
LikeLike
Pretty card – love the look you achieved on the leaves. Thanks so much for playing along at STAMPlorations.
LikeLike
Thanks so much Sherry!!!
LikeLike
WOWOWOWOWOW!! SO FUN!! LOVE the Design!! THANKS for sharing and Have a FABULOUS HALLOWEEN WEEKEND!! =)
LikeLike
Thanks so much Larissa!!!
LikeLike
This is amazing 🙂 Love those intricate dies and ur fabulous design and perfect execution 🙂 thank you for sharing with STAMPlorations!
LikeLike
Your use of the sketch is WOW. Your design and all the elements are amazing!!!! Thanks so much for playing along at STAMPlorations xx
LikeLike