
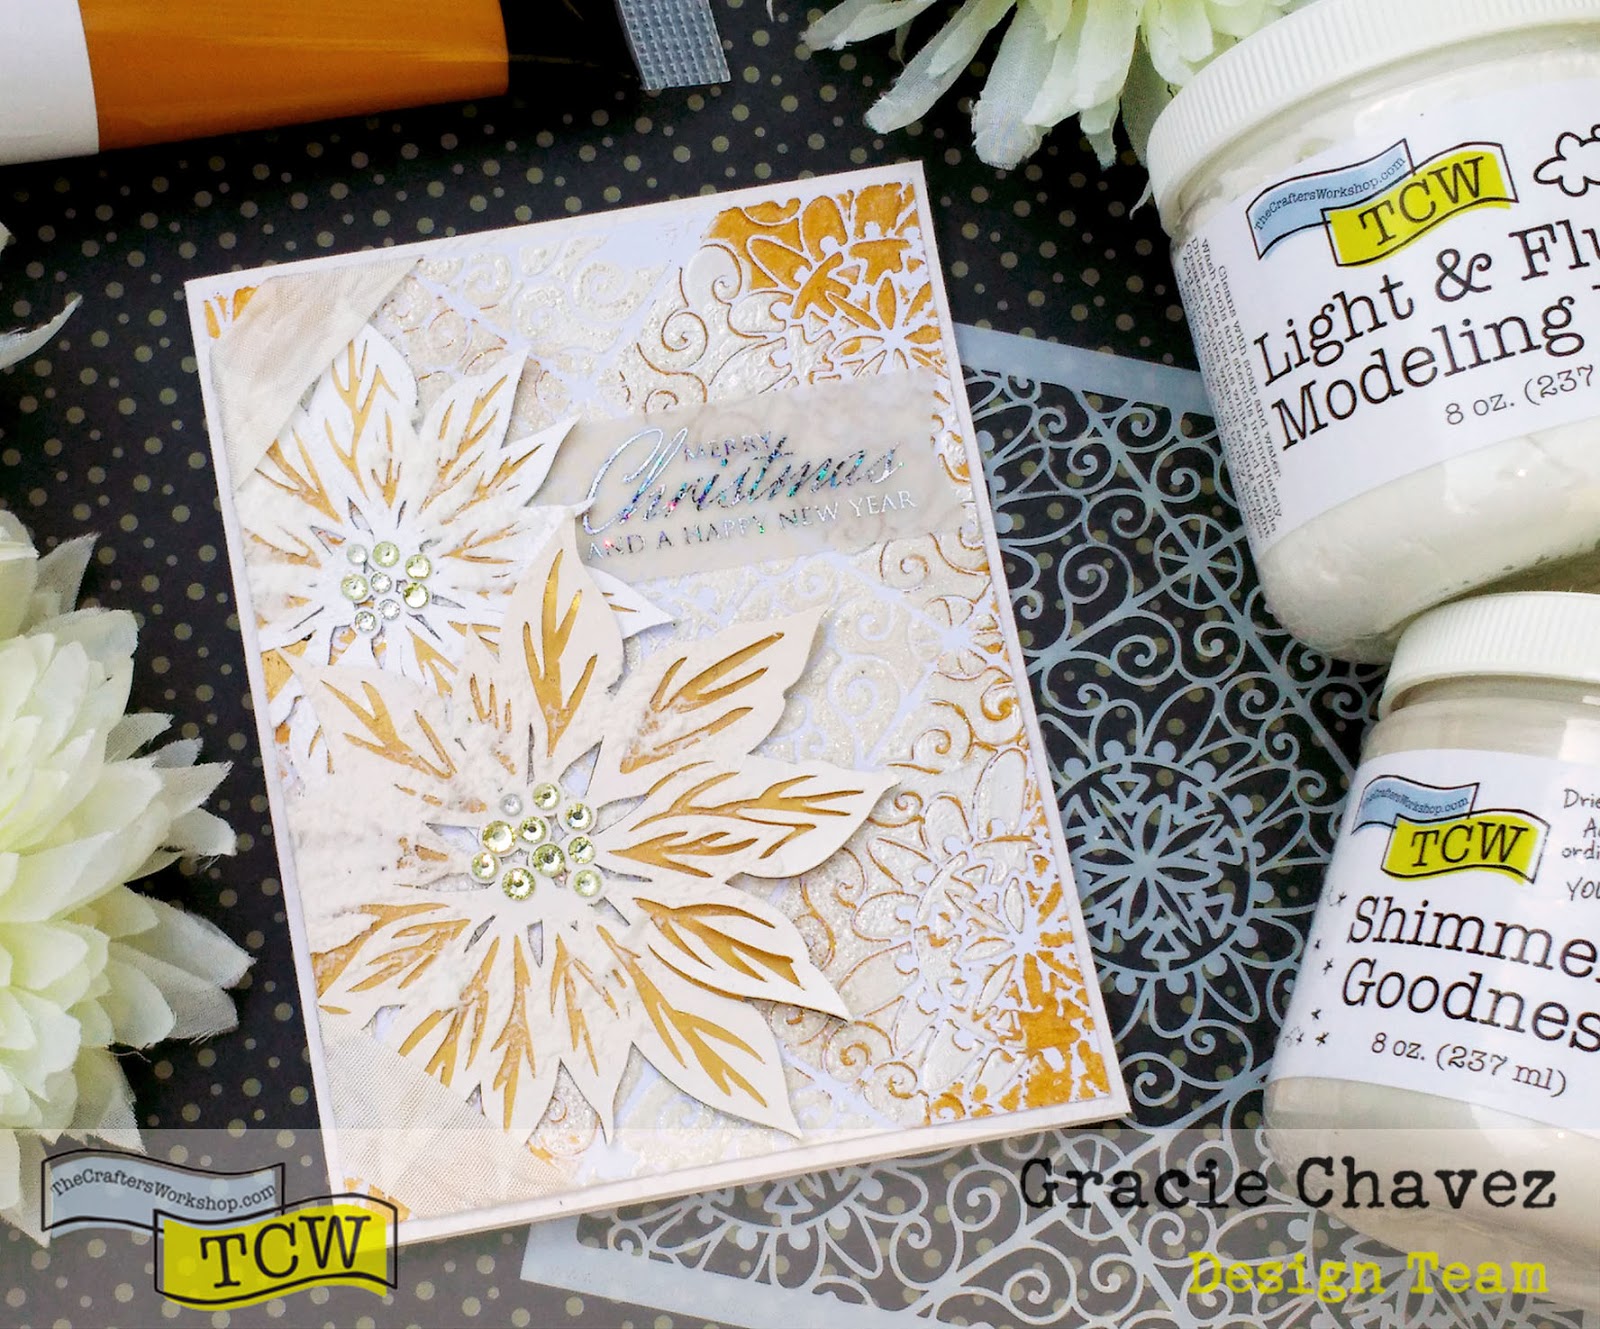
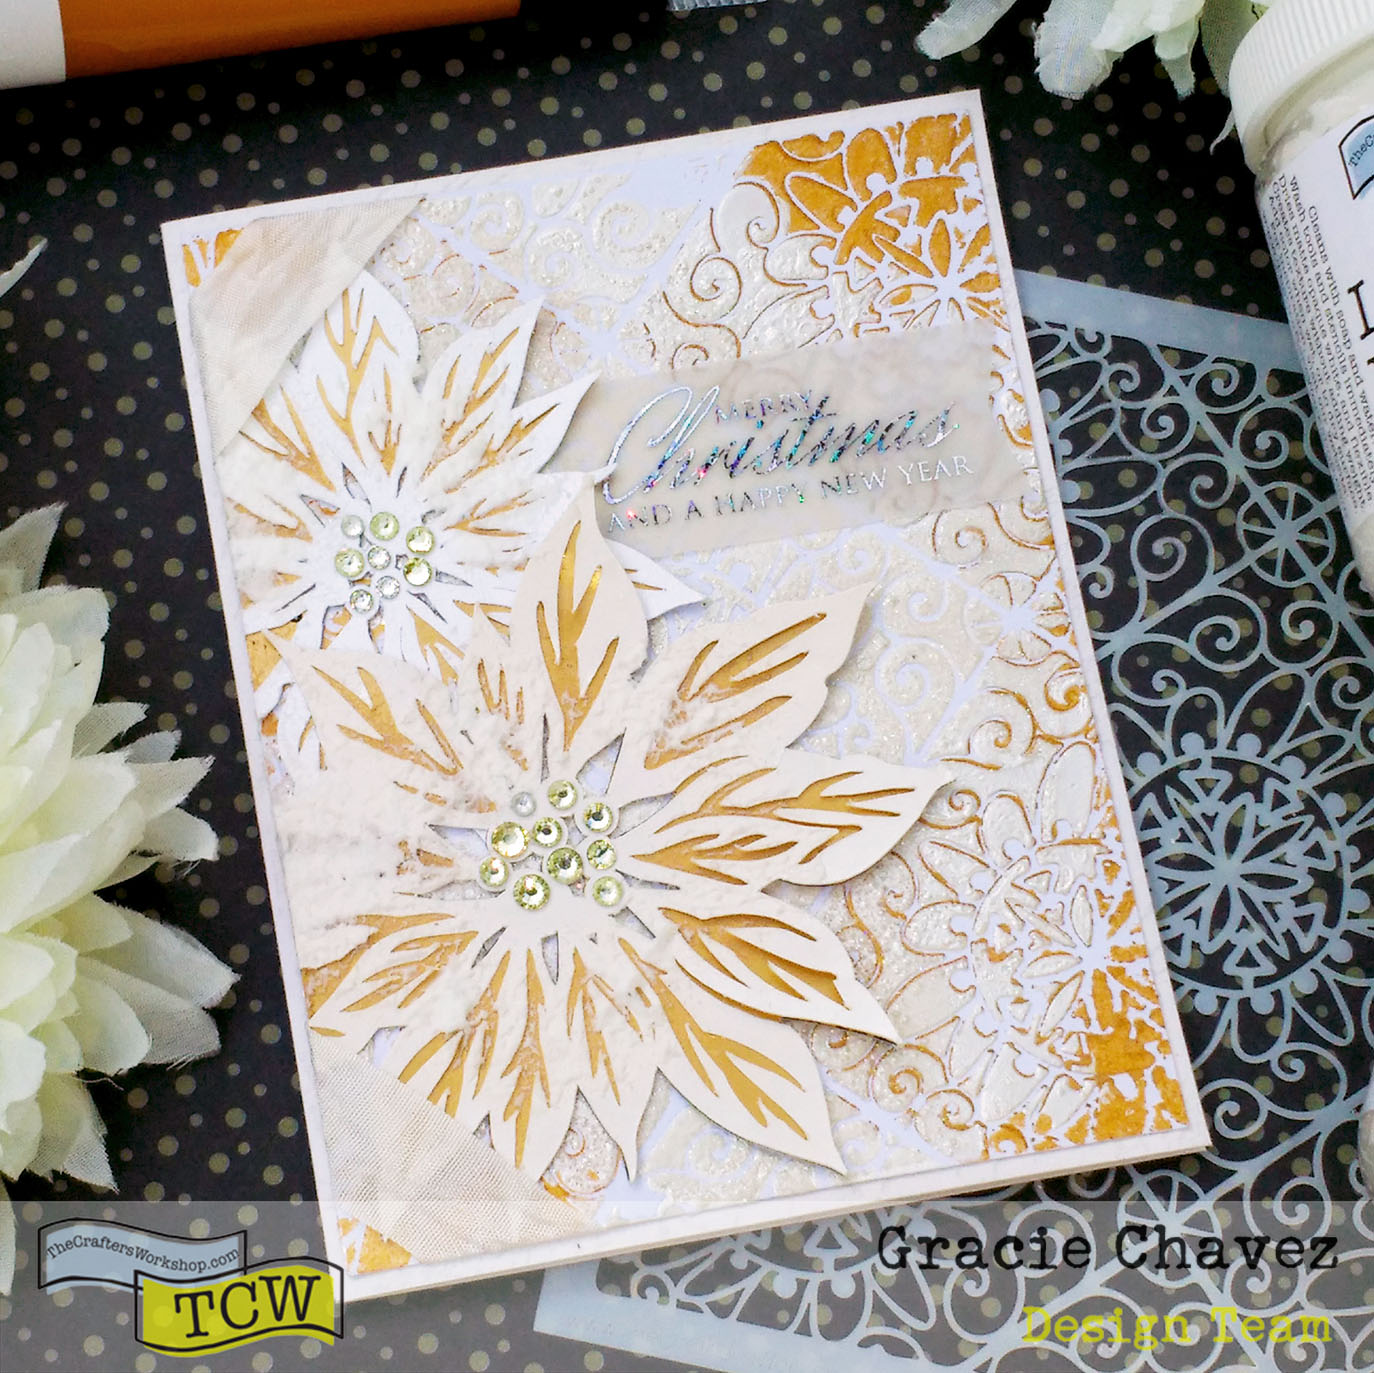
I’ve always loved seeing snow texture on Christmas projects and so I decided to add it to my own projects this year using The Crafter’s Workshop modeling pastes! I have a step by step tutorial on TCW’s blog for you so make sure to scroll down and click on the tutorial link.
Whenever I take a closer look at textured Christmas cards there’s usually a special snow texture paste used… (I actually have one of those.) But I’ll show you a way of achieving a very similiar look using supplies you may already have at home in combination with The Crafter’s Workshop texture pastes.

Tutorial & Supplies:
Click here to see how I created this background and how I added all the snow texture to my card. Supplies are listed and linked too over there!
I would love it if you could leave me a comment on the tutorial post letting me know what you think about this idea! Are you trying out the technique for your Christmas projects this year? That’s all for now. I’ll be back tomorrow with a new art journaling post to share. Until then!

This is a beautiful card 🙂 Thanks for sharing the tutorial! Such a simple technique but great effects!!
LikeLike
Thanks so much Karthikha!
LikeLike
Absolutely Gorgeous!!!
LikeLike
Thank you Esther!
LikeLike
Gorgeous!!
LikeLike
Thanks!
LikeLike
Great card. It's a fantastic design
Love so much your new blog appearance!!!!!
LikeLike
Very pretty.
LikeLike
Yay! Thank you! So glad to hear.
LikeLike
Thanks!
LikeLike
That's a gorgeous card ! I would definitely give it a try.
LikeLike