New Holiday Traditions Collection
Today I, once again, have a new project idea using digital products, but this time I want to share at least a couple of tips on how to make your digital paper prints even prettier, customizing them to fit all your holiday paper crafts! I finally have the pleasure to share with you my new Holiday Traditions Collection available now on Etsy as an instant download! I’ve prepared these stamps and papers with lots of love and anticipation and I can’t wait for you to try out each of the new sets!

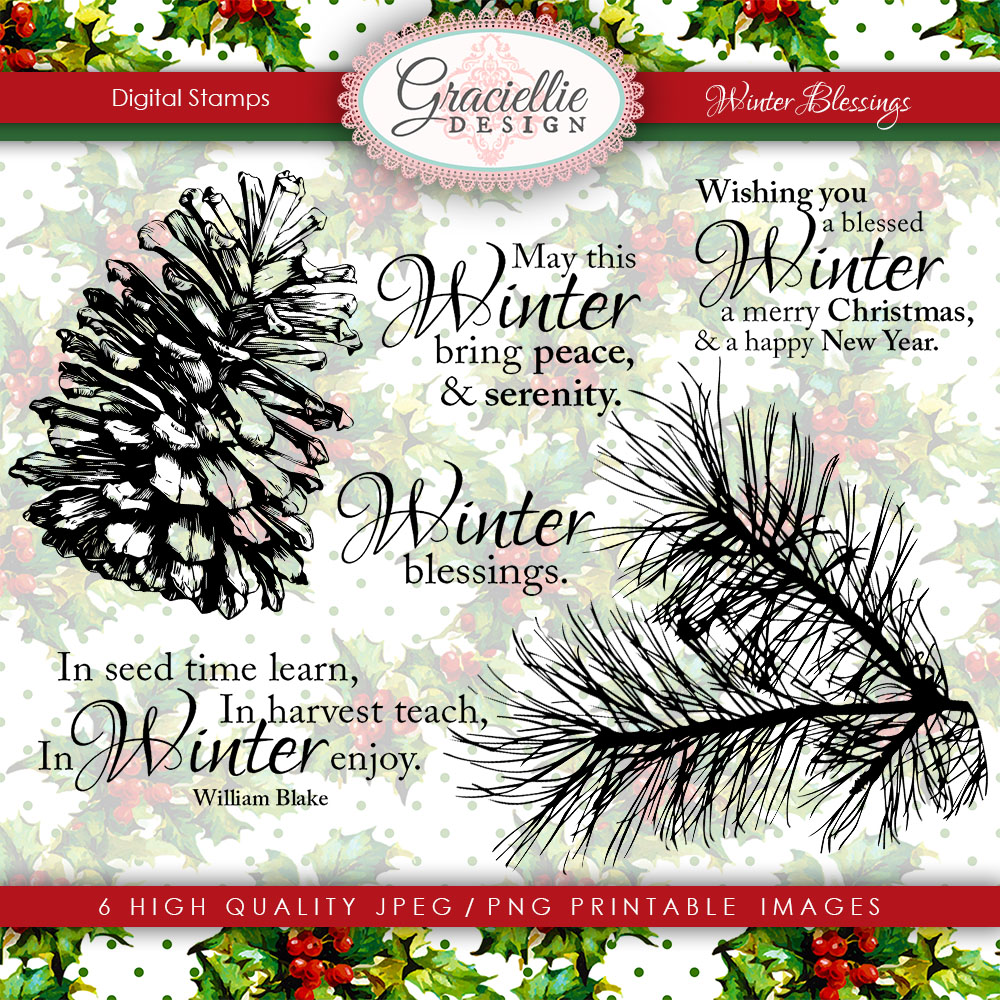
We are releasing 4 new stamp sets: Winter Blessings, Jingle Bells, Christmas Poinsettias and Cheery Christmas. Plus a beautiful new paper pack: Holiday Traditions. Mix and match all the images in this collection to create a unique project this Season.
when you buy all 5 of our new Christmas stamps and papers.


Tips for Digital Paper Prints
1. Adding foiled details.
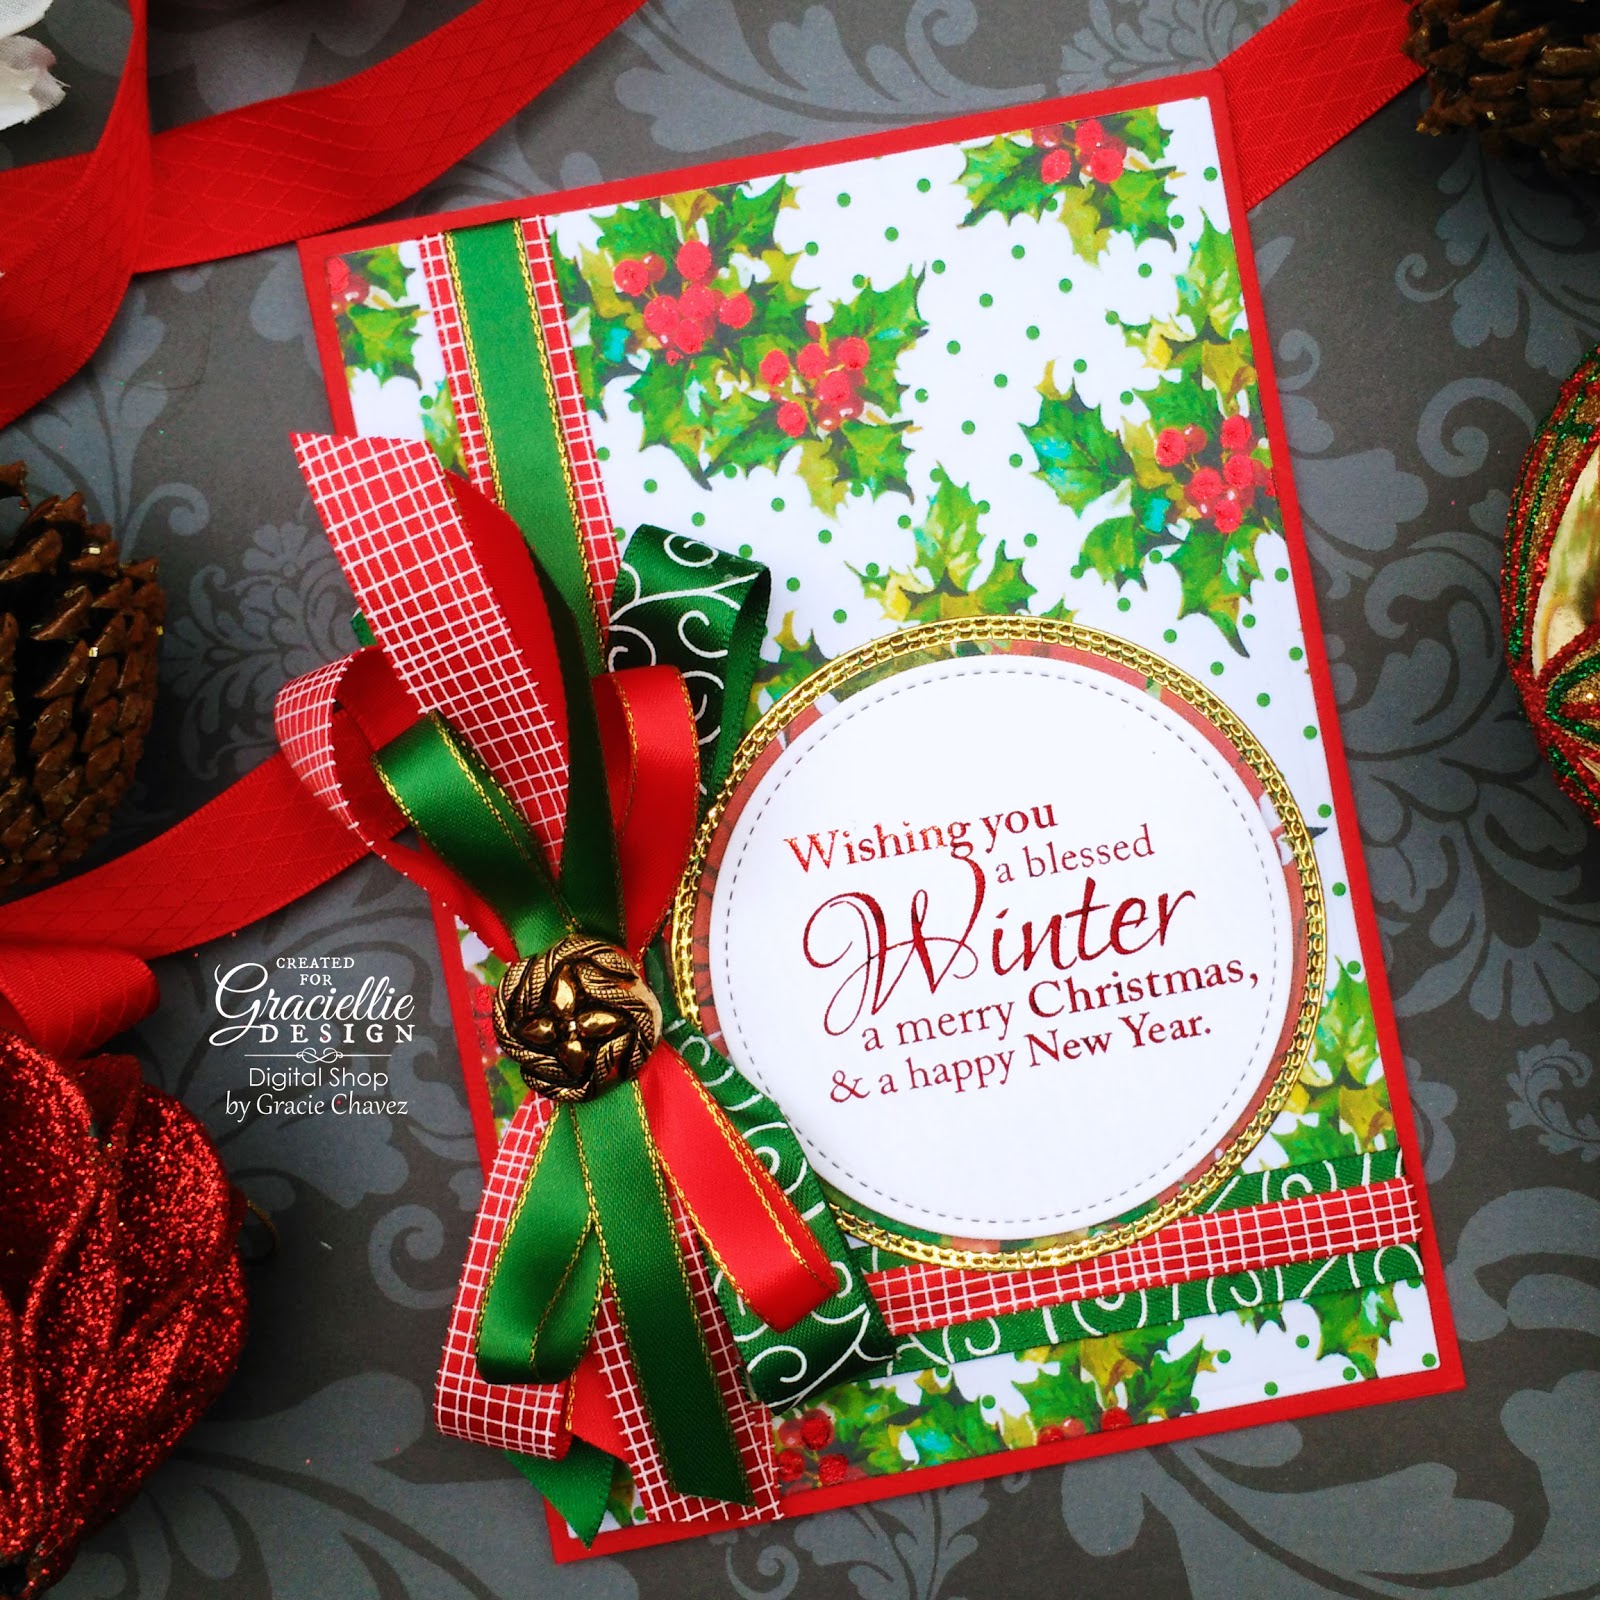
For today’s card I started out by printing one of my favorite patterns in Holiday Traditions in an Inkjet printer (which is what most of us already have at home). I wanted to add foiled details to the printed sheet and one of the easiest ways of doing that is using the Deco Foil Adhesive Pen. I used this pen to add dots of adhesive on some of the berries on the paper and let it dry. Once the adhesive was tacky I added some Gina K. Designs Fancy Foils in Radiant Red, burnishing it with my fingers. Another alternative product would be Deco Foil Adhesive which is thicker but works just the same.

There many more ways to add foiled details to digital papers, so I’ll leave here a couple of other ideas I’ve tried out in the past that could work great for you too, like foil splatters (here) or even reprinting your paper with a simple texture, using a laser printer so you can foil it (here).

2. Adding a sealing coat.
When you print on Inkjet printers, the ink is not permanent, meaning that any tiny bit of humidity can make your digital paper print smear. The solution for that is simple, add a coat of sealer. At some point in my life I used hair spray as a fixative. (As long as it doesn’t have a tacky finish, it works fine.) But then as I started building my stash I’ve discovered some products that work great and give your papers a beautiful finish. Lately I’ve been using Glitter Dust spray a lot for not only papers but also digital stamps. Glitter Dust comes in different colors, it is made by Therm O Web, and it gives your project a subtle sparkle. I love it! A light coat of Glitter Dust will do and the lighter your coat is, I find, the better the result.
Another product I enjoy using is Resin Spray. Resin is a form of plastic but this formula is extra easy to use and it’s meant for adding a glossy finish to resin pieces. I use it as a sealer when I want the print to look a little brighter and it also gives a semi glossy finish to the paper.. This is great if you don’t have special coated cardstock around. Three coats of Resin Spray and you’ll see the difference right away.

These are 2 tips I used myself to make today’s card. I know there are many more ways you could find to customize your digital papers, like printing them on vellum, glossy or textured cardstock and so much more… I encourage you to have fun discovering new ways of using digis!
Blog Hop & Giveaway


It´s a beautiful and elegant card, thanks so much for the tips. Hughs
LikeLike
Beautiful card, Gracie. Love all the tips you shared with us.
LikeLike
WOW! Gorgeous card!!
LikeLike
Wow!! This is a super gorgeous card!! Love the foiling and the beautiful colors!! Thank you so much for sharing the tips also with us 🙂
LikeLike
Everything coordinates so beautifully! Stunning creations!
LikeLike
Beautiful card Gracie!
LikeLike
great ideas and useful tips on foiling . Thanks for sharing 🙂
LikeLike
Such a gorgeous Christmas card and great tips!! Love your stamps and can't wait to see what all the other designers created!
LikeLike
Gorgeous card!! Thank you for sharing the sealants that can be used.
LikeLike
Fabulous card. X
LikeLike
Such a stunning creation – Great tips you shared to enhance digital papers too.
LikeLike
Beautiful card, Gracie. Thanks for the tips!
LikeLike
This is what I'm calling a perfect Christmas spirit card !!
LikeLike
So very beautiful and now I need glitter spray!
LikeLike
Beautiful card –love the ribbons too.
LikeLike
Beautiful card. I love that bow. Gorgeous!
LikeLike